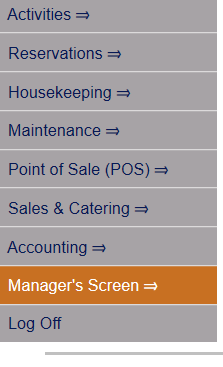
Select Manager's Screen to be taken to the MANAGER'S COMMANDS screen.
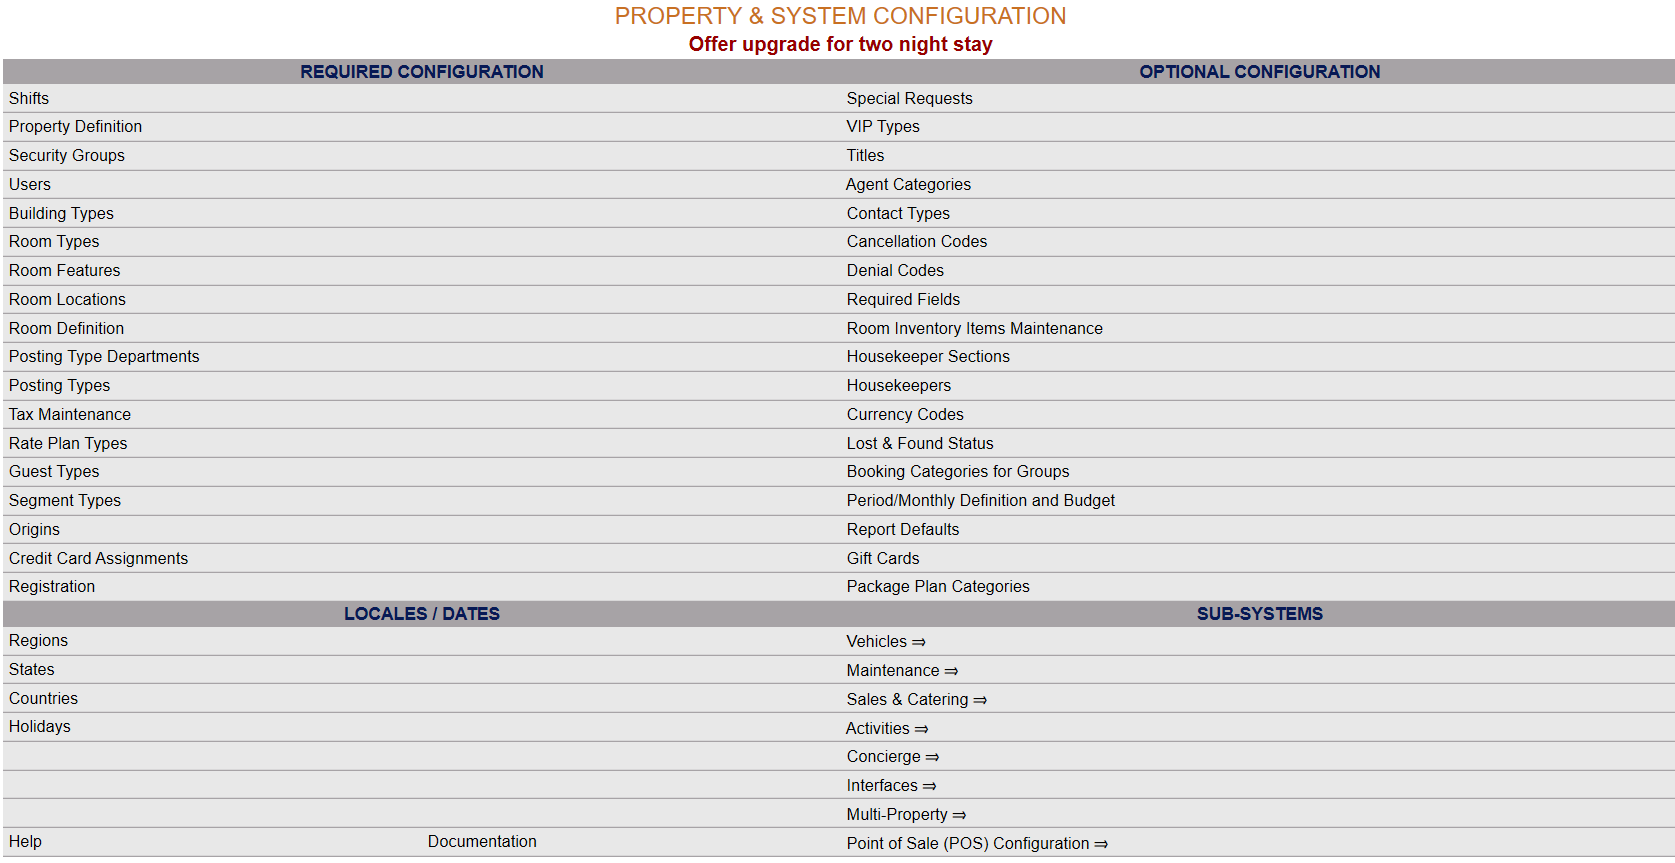
Select Configuration to be taken to the PROPERTY AND SYSTEM CONFIGURATION screen.
Alternately, you may also be able to select Configuration directly from the Quick Menu, if the menu has been set up to include the Configuration option.
This will take you to The Property System Configuration Menu.
The list of property configuration options are divided into four sections, which are Required Configuration, Optional Configuration, Locales/Dates and Sub-Systems.
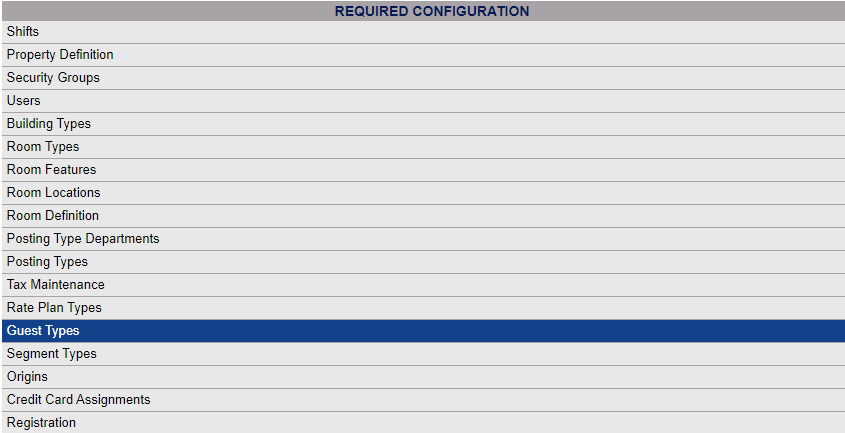
Select Guest Types from the Required Configuration section.
The Guest Type Maintenance screen display is split into two frames, with the left side of the screen listing the Guest Types already configured for your Property, and the right side containing the fields you need to complete in order to add or edit the configuration of a Guest Type. Any changes made on the right, once saved, will be updated in the listings to the left.
By Default, the General tab will be open when you arrive at the Guest Type Maintenance screen. A second tab, the Multi-Property tab, is also available, for use if you have more than one Property and wish to use the Guest Type in more than one property.
The currently configured options are displayed by:
All: The Guest type is available at all Properties.
Hotel: Name of default Property the Guest type is assigned to.
Order: List Order of the Guest Type.
Code: A short version of a name for the specific Guest Type. Codes can be up to 10 characters.
Name: The actual name of the Guest Type or how you refer to it.
Your options include the following:
Generate a new entry:
Click the New ![]() button from the toolbar to add a new Guest Type record. Complete the fields described below.
button from the toolbar to add a new Guest Type record. Complete the fields described below.
OR:
Select an existing Guest Type from the list on the left, and click the Replicate ![]() button from the toolbar. Then change the field information as described below.
button from the toolbar. Then change the field information as described below.
Edit the current selection:
Change the field information.
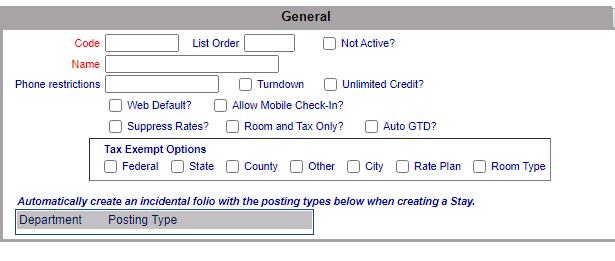
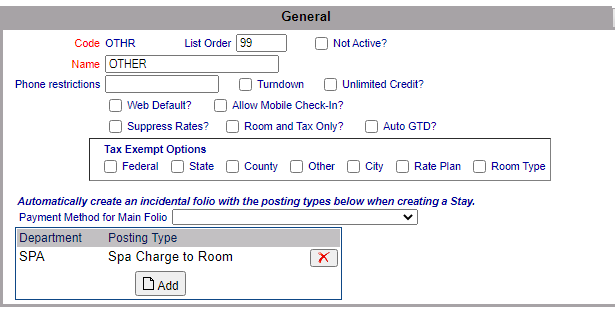
Code: The short version of a name for the specific Guest Type. Codes can be up to 10 characters. Be sure to select a code that will be easily recognizable to your Staff.
This field is required.
List Order: This determines in what order the Guest Type appears listed in the interface.
Enter a number into the List Order field.
This field is optional, however it we recommend that you list the Guest Types in the order you prefer. This makes it easier for staff to find the Guest Type they need in the interface.
Not Active: This box may be checked or unchecked. By default it is unchecked. Click this option to deactivate the Guest Type without deleting it. Once a Guest Type has any stays associated with it, it cannot be deleted from the system.
Name: This is the name or description of the Guest Type. You should enter the full name of the Guest Type here.
This field is required.
Phone Restrictions: The Guest Type may be restricted in their phone usage within the room - to local calls only, for example.
Turndown: This box may be checked or unchecked. If checked, the Guest Type will automatically be assigned a turndown service whenever they stay.
Unlimited Credit: This box may be checked or unchecked. If checked, the associated Guest Type will be automatically assumed to have enough credit for any charges they accrue, without checking first.
Web Default?: For use with Skyware booking engines. If a reservation is made through a Skyware booking engine, one (and only one) Guest Type will be assigned as the as the web default option. This box may be checked or unchecked. If checked, the Guest Type will be the web default option.
Note: Checking this box for any Guest Type will REMOVE any previously selected web default selection, as there may only be one.
Allow Mobile Check-in?: This box may be checked or unchecked. If checked, the associated Guest Type is allowed to check in remotely for their reservation using mobile check-in.
Note: This form of remote check-in should be enabled for your preferred guest types ONLY, as it does not require a registration card to be signed nor a credit card swipe to allow the check-in to proceed. Mobile check-in assumes the guest has a "trusted" status already established and allows the guest to by-pass the kiosk step required using contactless check-in to get the key. See Mobile and/or Contactless Check-In for more details.
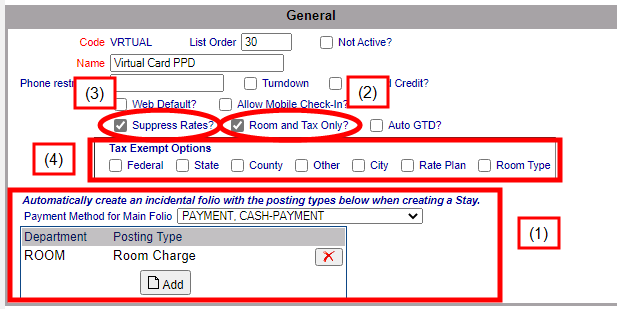
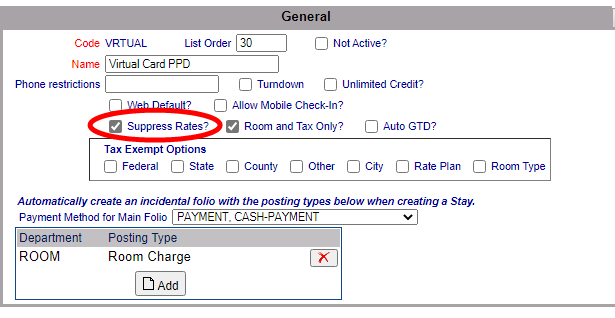
Suppress Rates?: This box may be checked or unchecked. If checked, the OTA rate will not be shown on any guest documents.
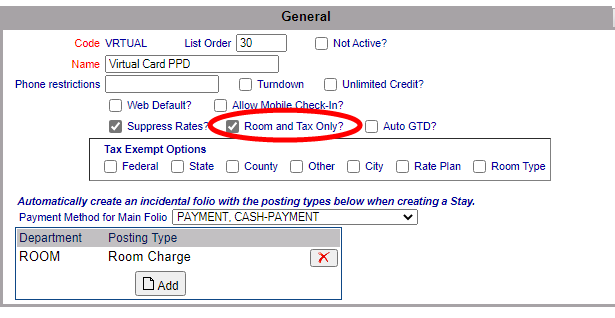
Room and Tax only?: This box may be checked or unchecked. If checked, this will prevent advanced authorizations from occurring. This check box is used when the Guest Type is associated with a Virtual Credit Card. In a standard reservation made at your Property, the guest credit card would be authorized for everything. In a reservation generated via a channel, the virtual credit card is created for the room and tax, leaving the customer credit card to cover incidentals only, at the time of the stay.
Auto GTD?: This box may be checked or unchecked. If checked, this automatically guarantees the reservation, without requiring a credit card.
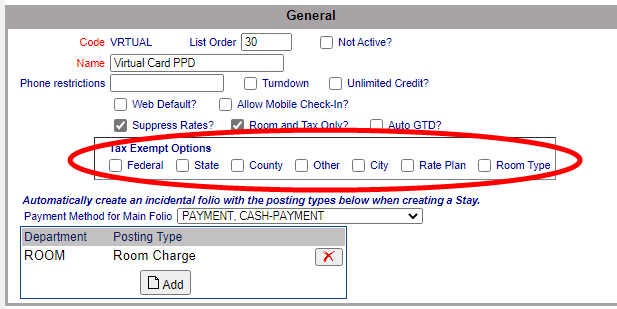
Tax Exempt Options: The Guest Type may be designated exempt from specific taxes (for example non-profit organizations, or veterans). Select the appropriate tax options to exempt the Guest Type from by checking the appropriate boxes in this section. You may select from Federal, State, County, Other, Rate Plan and/or Room Type.
At this point, once you have entered the information in the General tab you should click the SAVE button (![]() ) in the local tool bar.
) in the local tool bar.
This will save the Guest Type that you have just created and update the section on the left.
Incidental Folios are only generated for a Guest Type if a Posting Type has been added to the Incidental Folio section.
Every Guest Type configured has a main Folio associated with it. This section enables you to add a second folio to a Guest Type. For any Guest Type, you may automatically have ONE main Folio AND an Incidental Folio generated, if desired. (Subsequently, additional Folios may also be allocated at the Stay level).
Note: If generating a NEW Guest Type, it MUST have been already saved (and therefore exist in the system) to enable Posting Types to be added in this section. (the Add button will not be visible until the Guest Type has been configured).
Click the gray Add button in the Incidental Folio section to open the Automatic Postings for Incidental Folio screen.
This screen allows you to select the Guest Type the automatic posting will be attached to, and the Posting Type. These are both required options to add an automatic posting type.
Guest Type: This is a drop-down menu of all configured Guest Type options. By default, the Guest Type you reached this screen from will be selected. (This may be changed here, with the posting type option selected applied to the SELECTED Guest Type).
Posting Type: This is a drop-down menu of all available Posting Type options. ANY Posting type may be attached. For example, you may have a Guest Type associated specifically with your Spa services.
(Note: For a Virtual Credit Card Configuration, you will need to select your Room charge and Tax Posting Type option).
Click the save button (![]() ) in the local tool bar. This will add the selected Posting Type to the list of configured automatic postings displayed on the left. You may add multiple posting types if desired to a Guest Type, one at a time.
) in the local tool bar. This will add the selected Posting Type to the list of configured automatic postings displayed on the left. You may add multiple posting types if desired to a Guest Type, one at a time.
When ready, to return to the Guest Type screen, click the gray button Guest Type in the local tool bar.
This will return you to the Guest Type Maintenance screen, with the selected Posting Type(s) added to the incidental folio section. This means any charges associated with the posting types in this section will be assigned to the incidental folio, not the main folio.
This will also cause a new option to be displayed, asking for a payment method for the MAIN folio to be selected. This is a drop-down menu of available payment methods; select one.
Default Hotel: This is a drop-down menu of all your available Properties in Skyware to select as the default Property assigned for the Guest Type. By default the Property you are currently logged into Skyware from will be used. Select one.
This field is required.
This guest type is available to all properties?: This box may be checked or unchecked. By default it is unchecked.
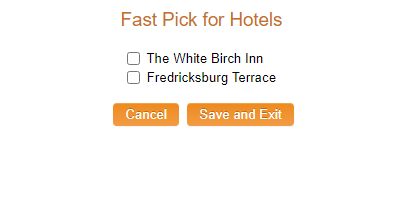
If it is unchecked, the Guest Type may still be available at more than one Property. The Properties that the Guest Type is available at OTHER than the default hotel may be selected using the Fast pick option in the Hotel Name section, which lists where the Guest Type is available (the Default Hotel and ONLY these properties).
Click the gray Fast Pick button to open a separate window listing all the available Properties.
Select any that are applicable and then click the orange Save and Exit button.
The selected properties will now be listed in the Hotel Name section.
Note: If the box is checked (indicating that the Guest Type is available at ALL Properties), the Hotel Name section and Fast Pick option will no longer be available.
